
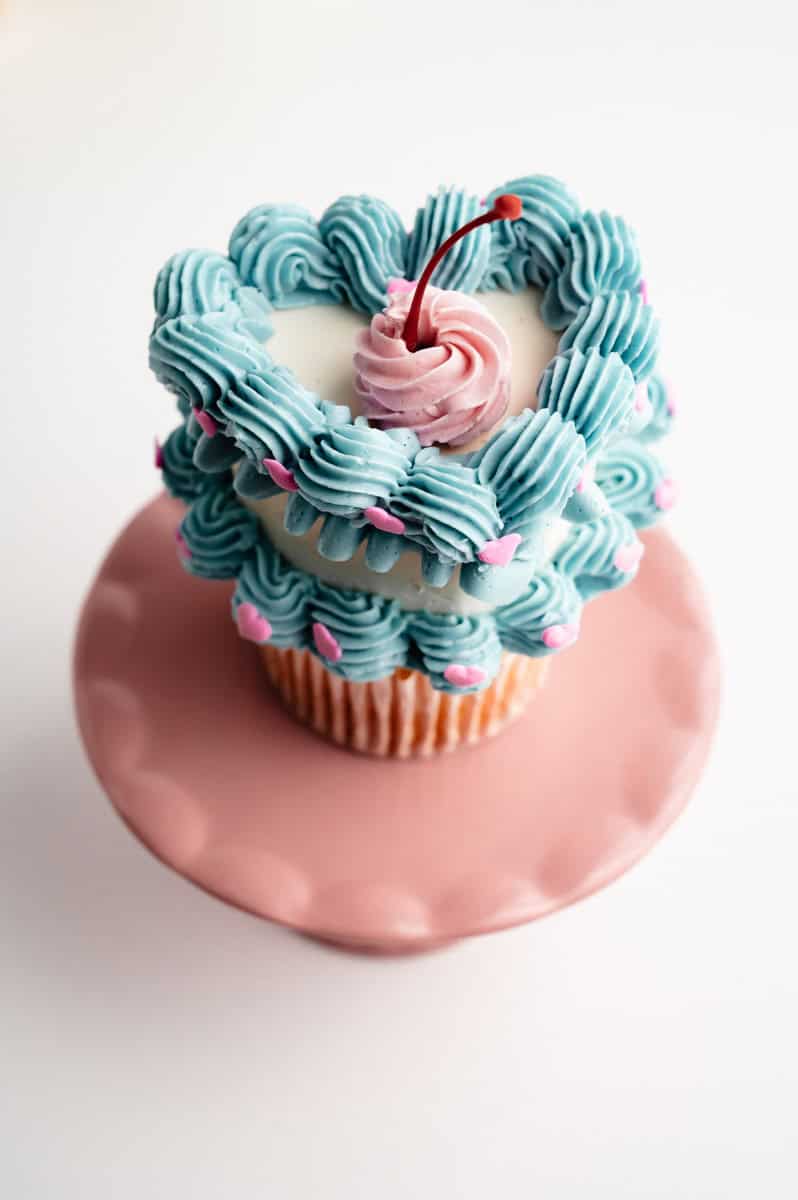
Vintage cakes are back and smaller than ever! You have all seen the viral vintage heart cakes and I wanted to put my own spin on it. If you want to celebrate the small wins, this cupcake design is the perfect one for you.
Jump to:
Occasion
These cupcakes are created in honor of Transgender Awareness Week and the Transgender Day of Remembrance. I wanted to create a 'mini-cake' cupcake to celebrate and honor the transgender community. Given the current climate, it's important to me as a queer baker to support the transgender community. In my cupcakes, I used the transgender flag colors, white as the heart base, blue for the borders, and pink for my accent color however, feel free to be creative and use colors that speak to you. This is a space to express yourself. Learn more about Gae Cupcakes
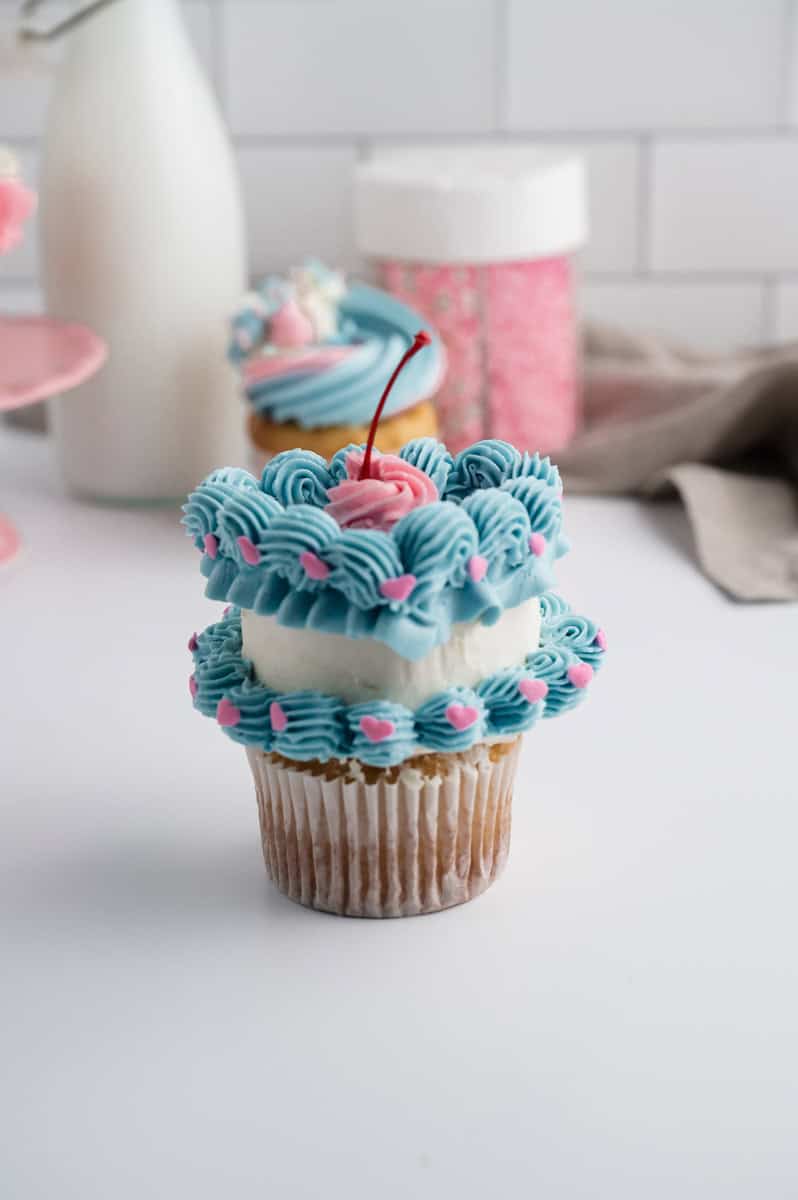
Decorating Technique- Silicone Baking Mold
This decorating technique can be used on many types of cupcakes. In this tutorial, I used a vanilla yellow cake recipe. By using a shaped silicone mold, you can make your cupcakes as simple or intricate as you would like.
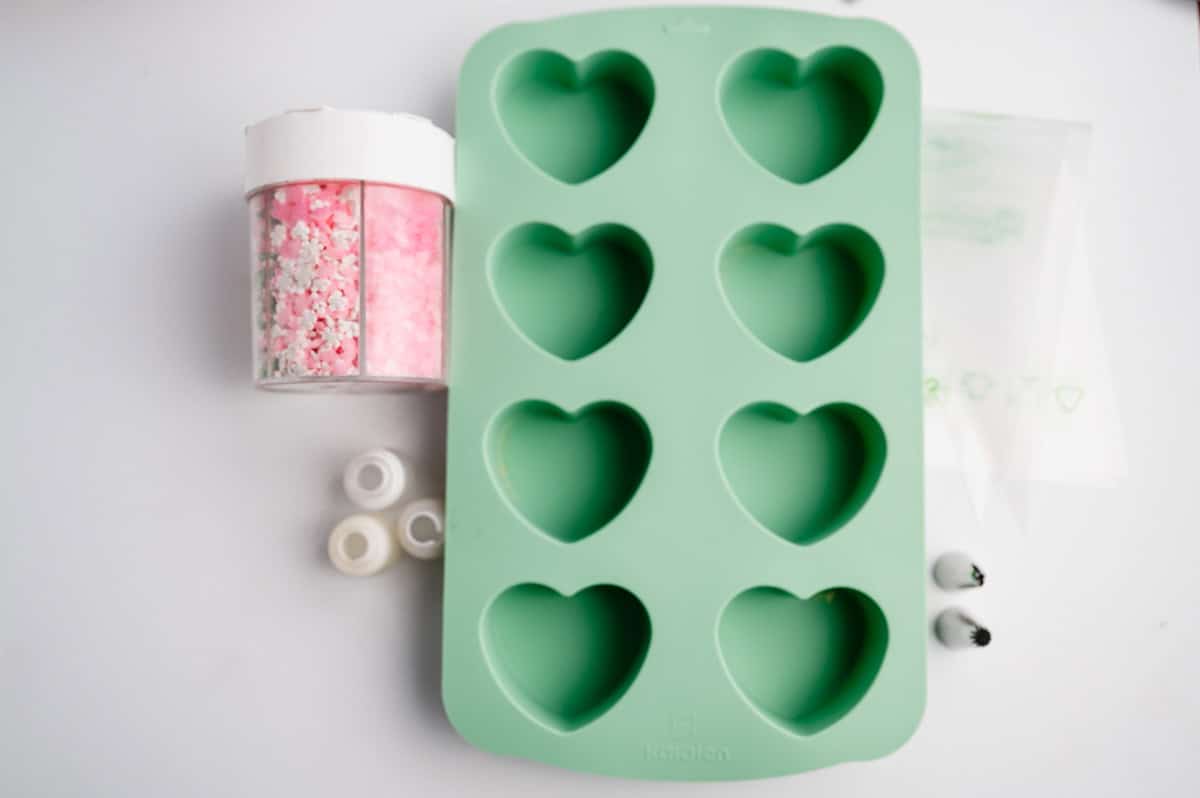
The essential equipment and ingredients include a heart silicone cupcake mold, buttercream, piping bags, and decorating piping tips. All other items listed below will make it easier and faster for you but are not mandatory to successfully create your heart cupcake.
Supply List
I usually get my supplies from Amazon. The supplies I used for this design are linked below from my Amazon Storefront.
- Cupcakes
- Bowls
- Spatula
- Piping Bags
- Coupler for Piping Bags
- Room Temperature Buttercream or Frosting
- Heart Baking Silicone Mold
- Decorating Piping Tips
- Sprinkles
- Marshino Cherry Stem (optional)
Instructions
Before beginning, I recommend reading the instructions thoroughly and watching the video.
- Step 1: Separate your buttercream into two or three portions, depending on your design, and set them aside. Color the buttercream according to your plan, using one primary color, a secondary color, and an accent color (if using three colors). For the primary base color, make sure the buttercream is at room temperature or has a slightly warm consistency. For this tutorial, I made buttercream in White (primary), Light Blue (Secondary), and Light Pink (Accent).
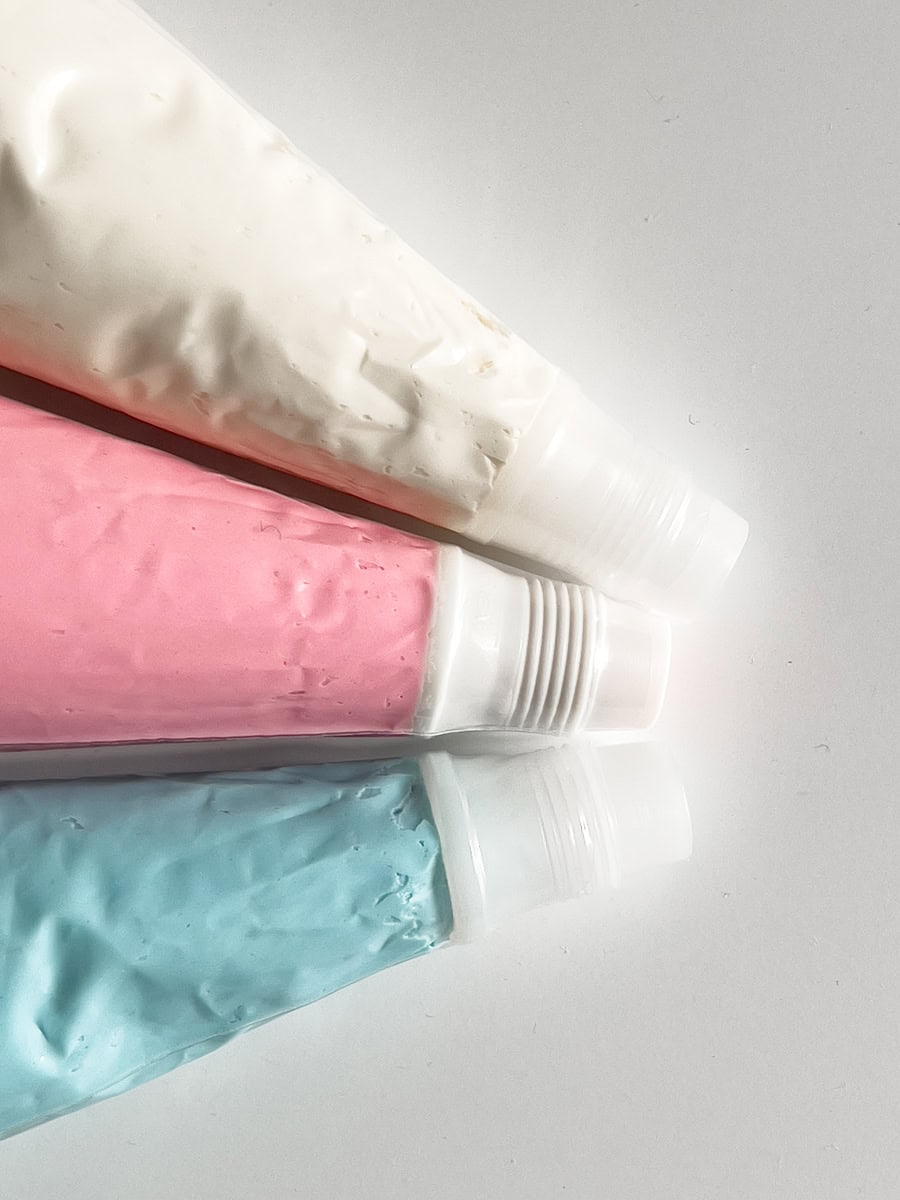
- Step 2: Insert your coupler into a piping bag. Using a piping bag and spatula, transfer your colored buttercream into your piping bag with a coupler.
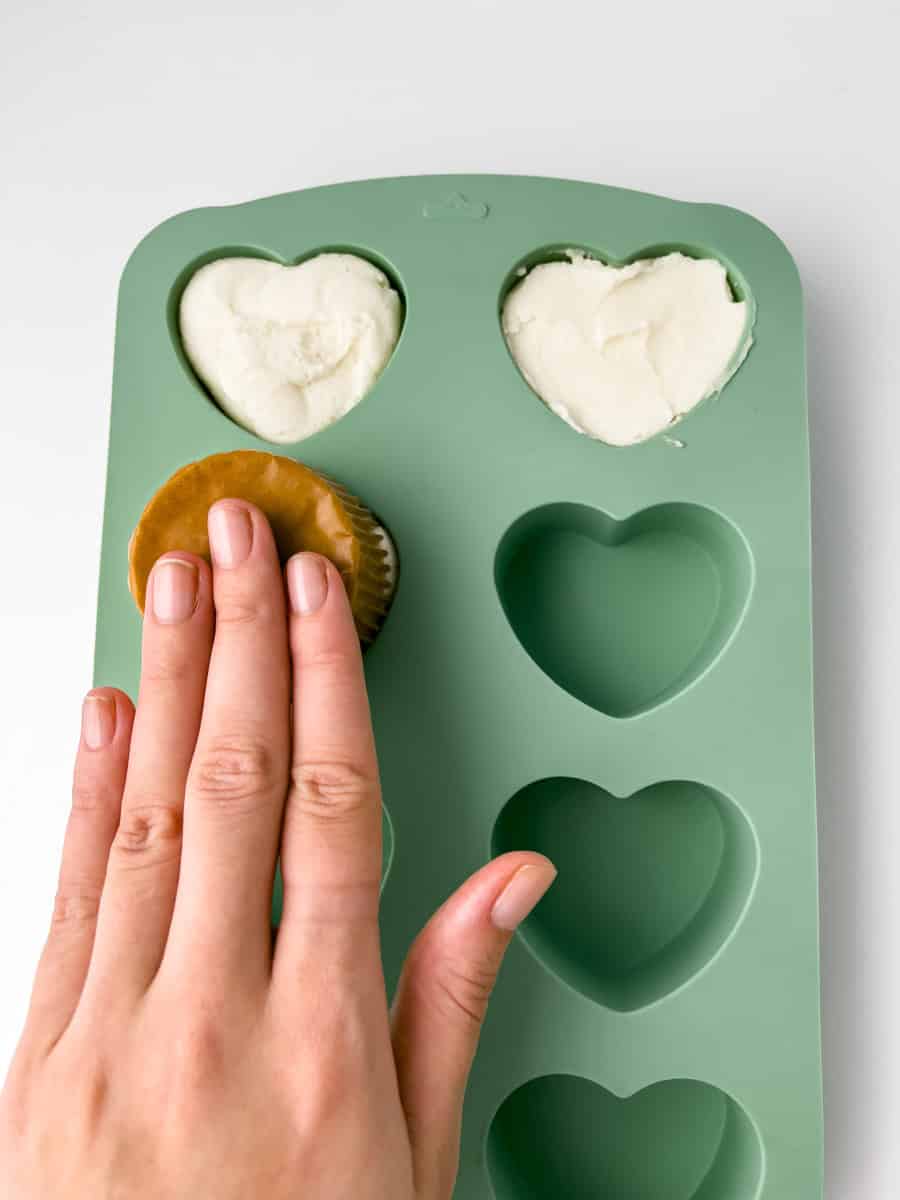
- Step 3: Pipe your primary base color into the heart-shaped baking mold. Then, fill the mold with buttercream up to the top, making sure not to overfill. To remove any air bubbles, hold the edges of the mold and gently shake it in an up-and-down motion several times.
- Step 4: Place your cupcake top part face down, onto the buttercream. Tap down on the cupcake to ensure that the cupcake is touching the buttercream within the heart mold.
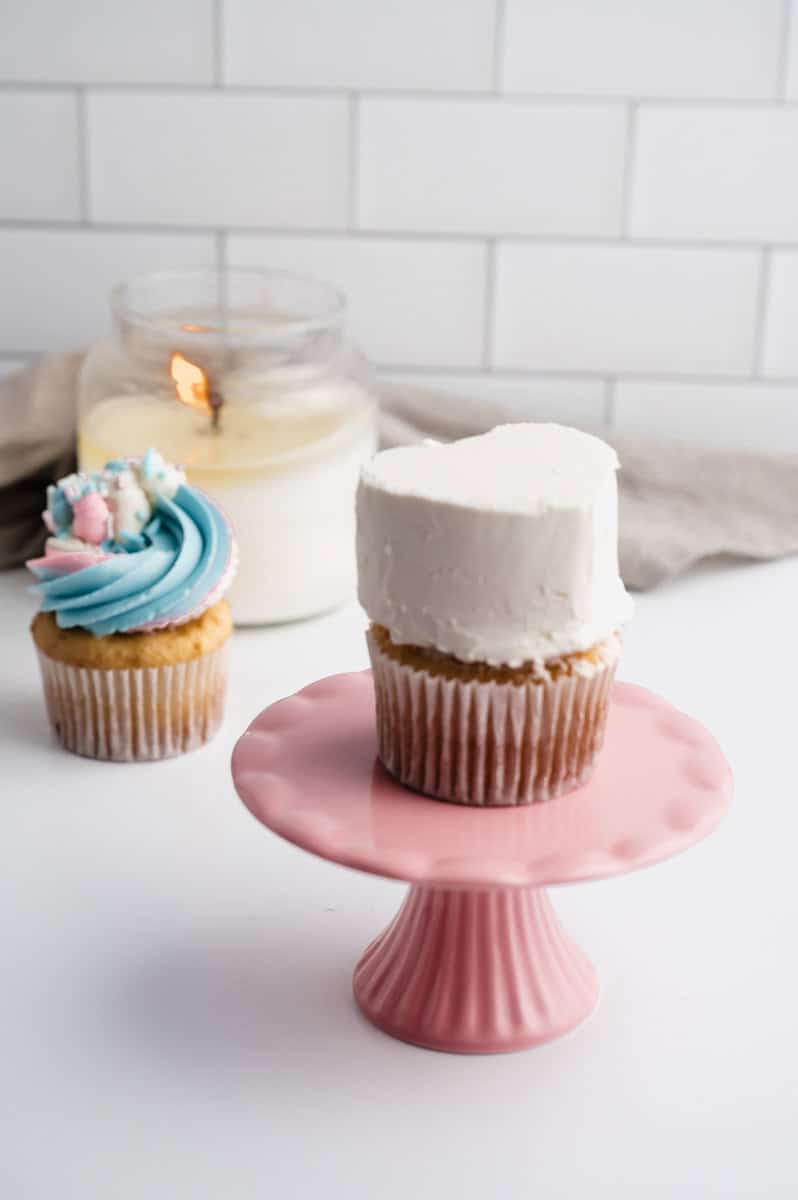
- Step 5: Place your buttercream heart cupcake into the freezer for 15 minutes. Remove the cupcake and buttercream heart from the mold carefully, making sure to keep the frosting and cupcake together in one piece.
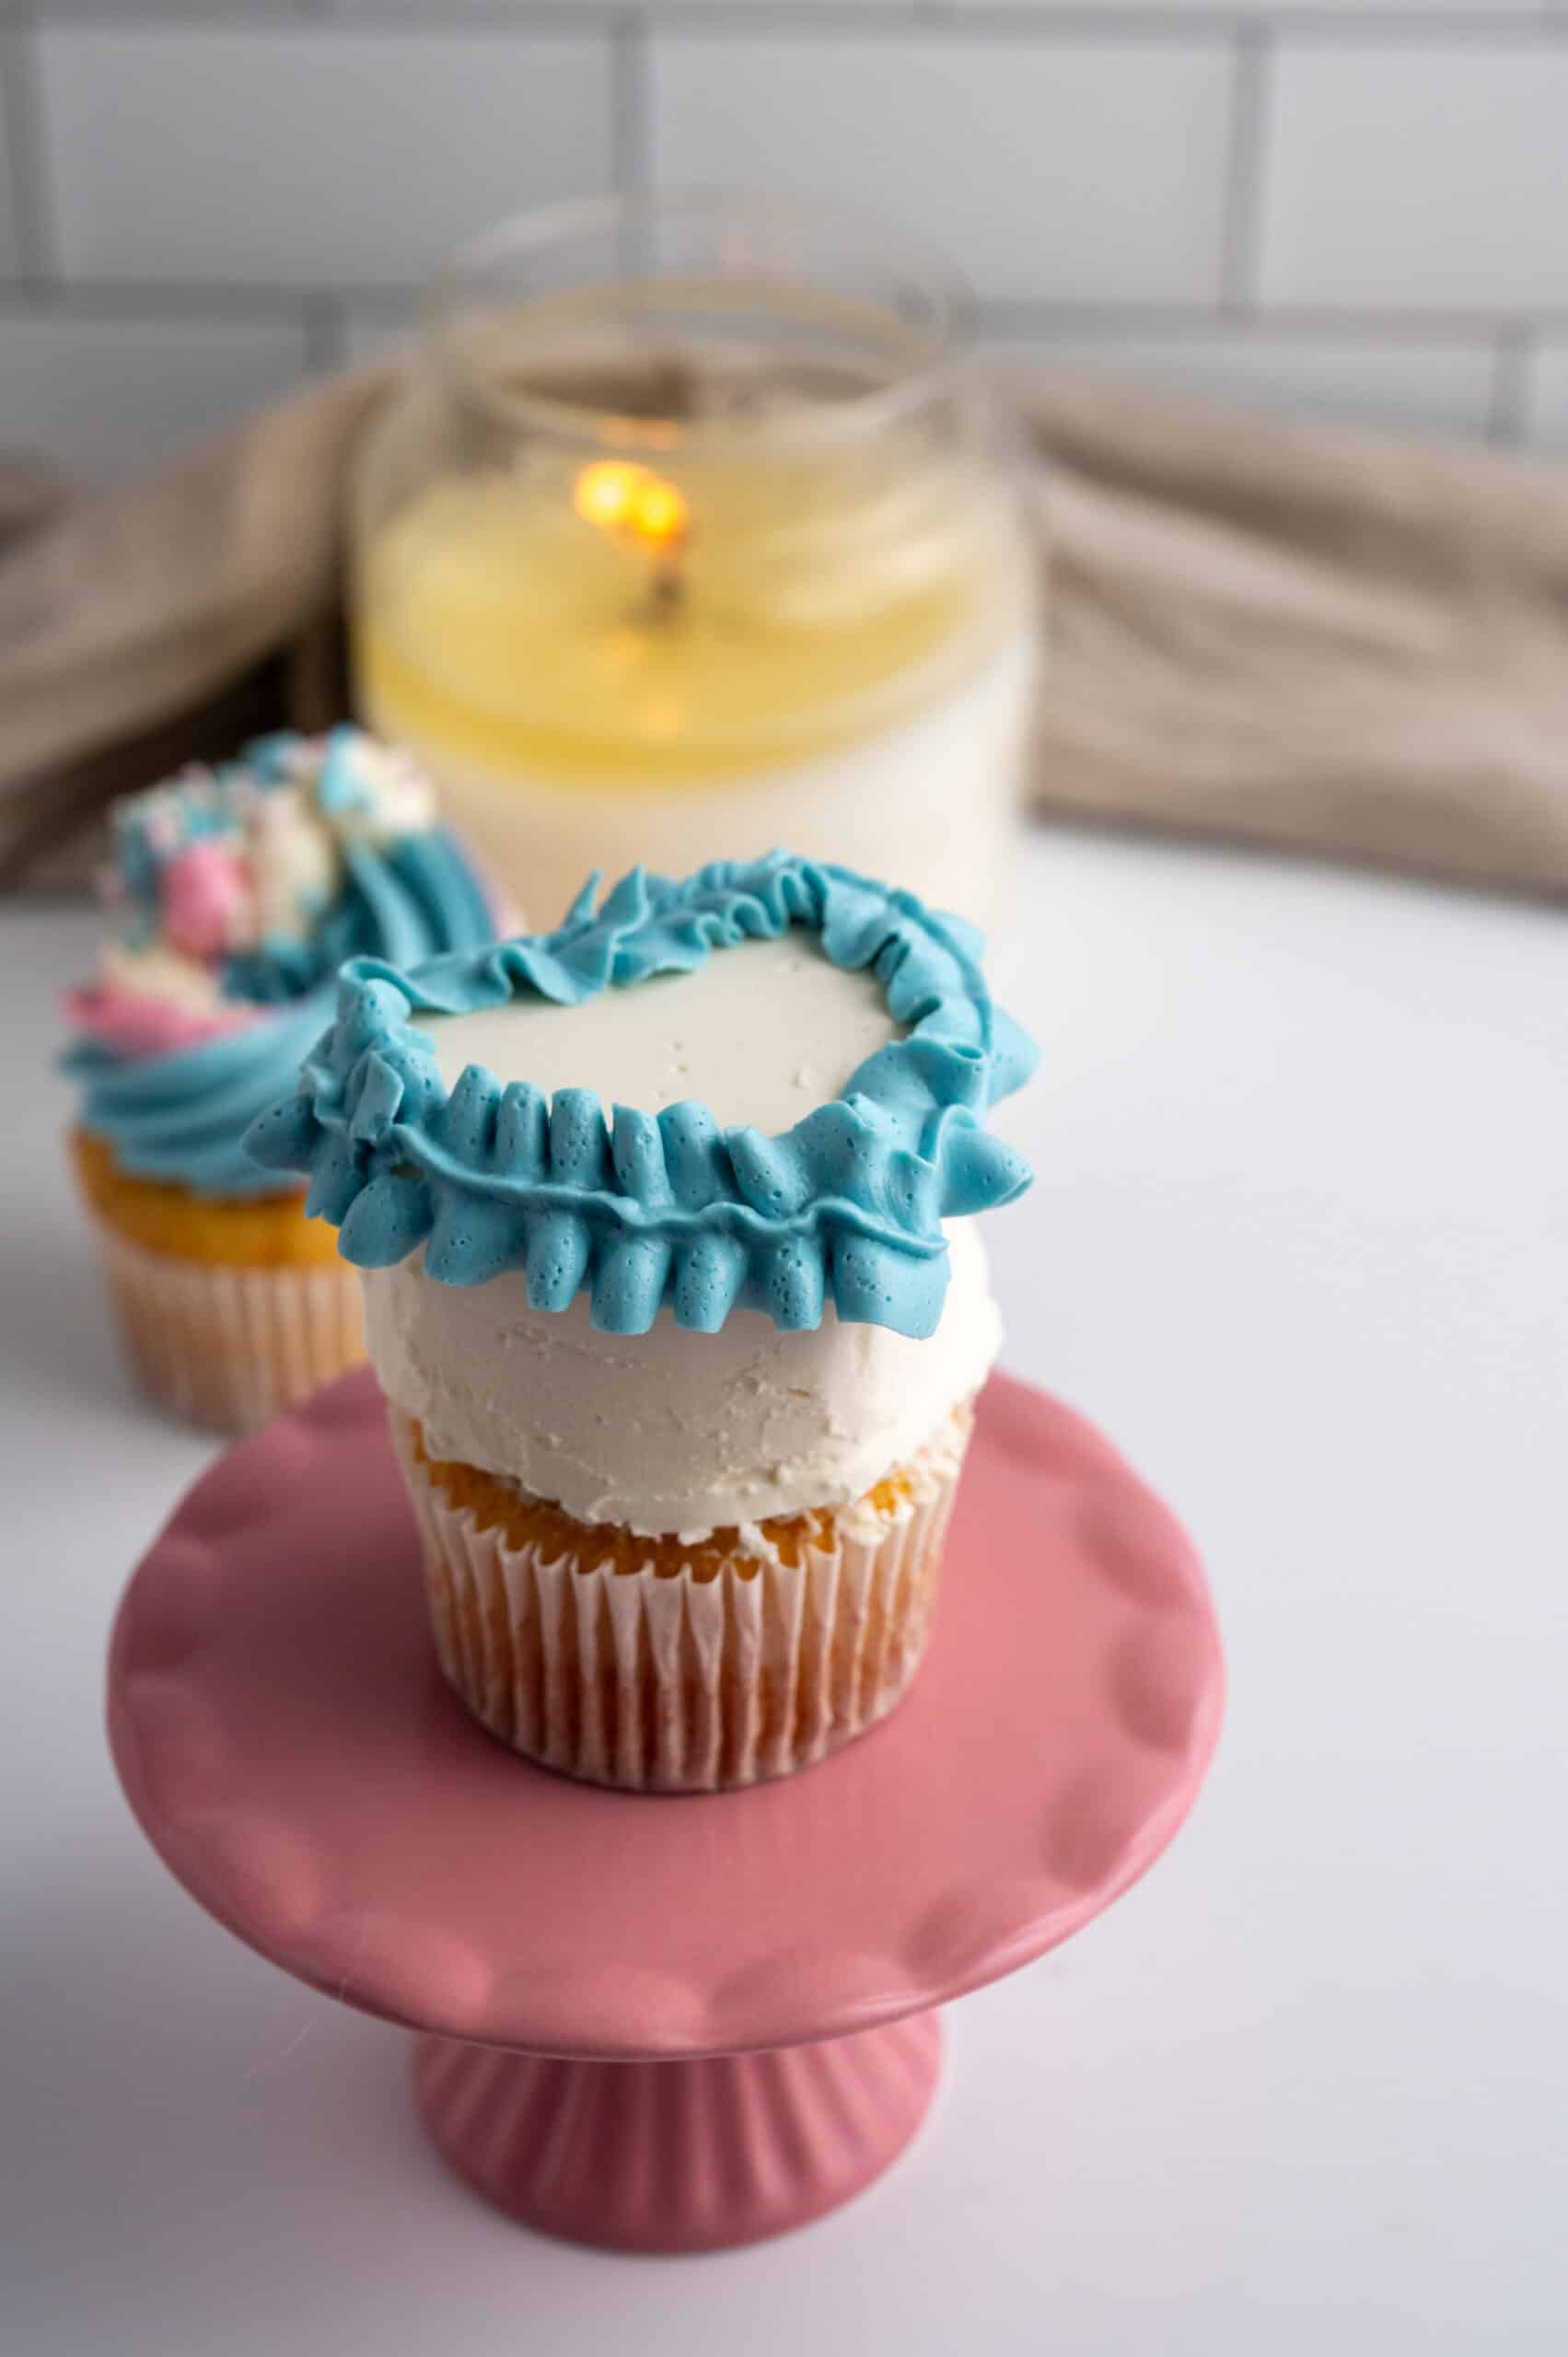
6. Step 6: Place a Wilton piping tip #70 into the coupler of your secondary buttercream color. Pipe along the top edge of the buttercream heart. Keep a steady and even pressure along the border.
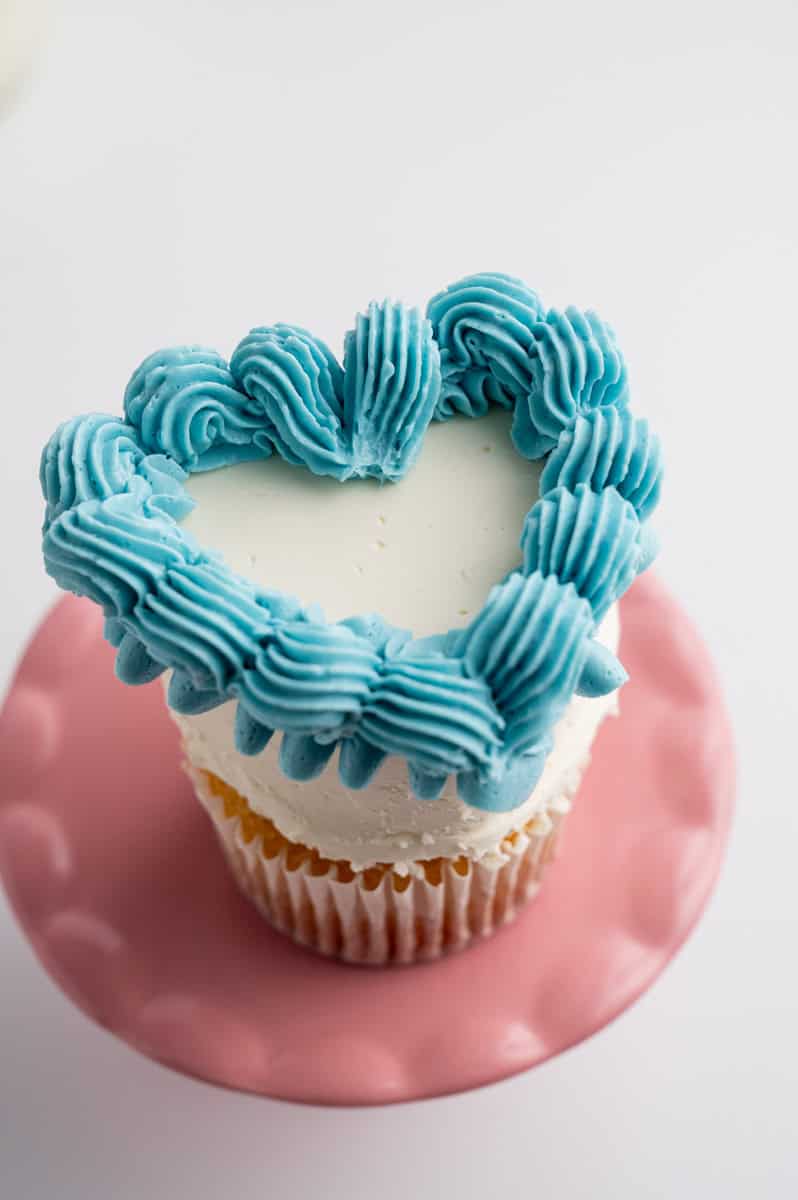
7. Step 7: Change the piping tip in the coupler, from Wilton a #70 tip to a shell border piping tip, Wilton Piping Tip #32. In a wave motion, squeeze the piping bag and create a mini wave. Repeat this motion on top of the border created in Step 6. Add sprinkles between the shells, which can be an accent color or decoration.
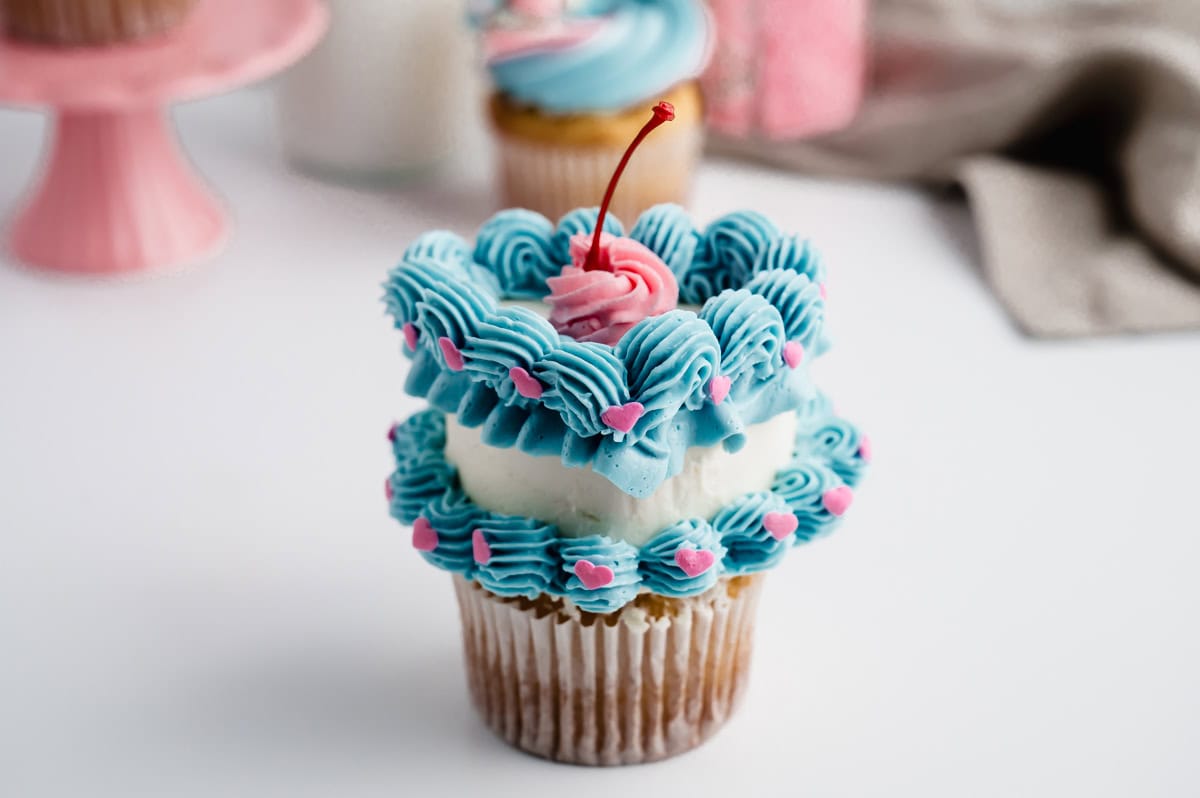
8. Step 8: Repeat the wave motion on the bottom portion of the heart, bordering the bottom of the heart. Add sprinkles on the bottom on top of the shells.
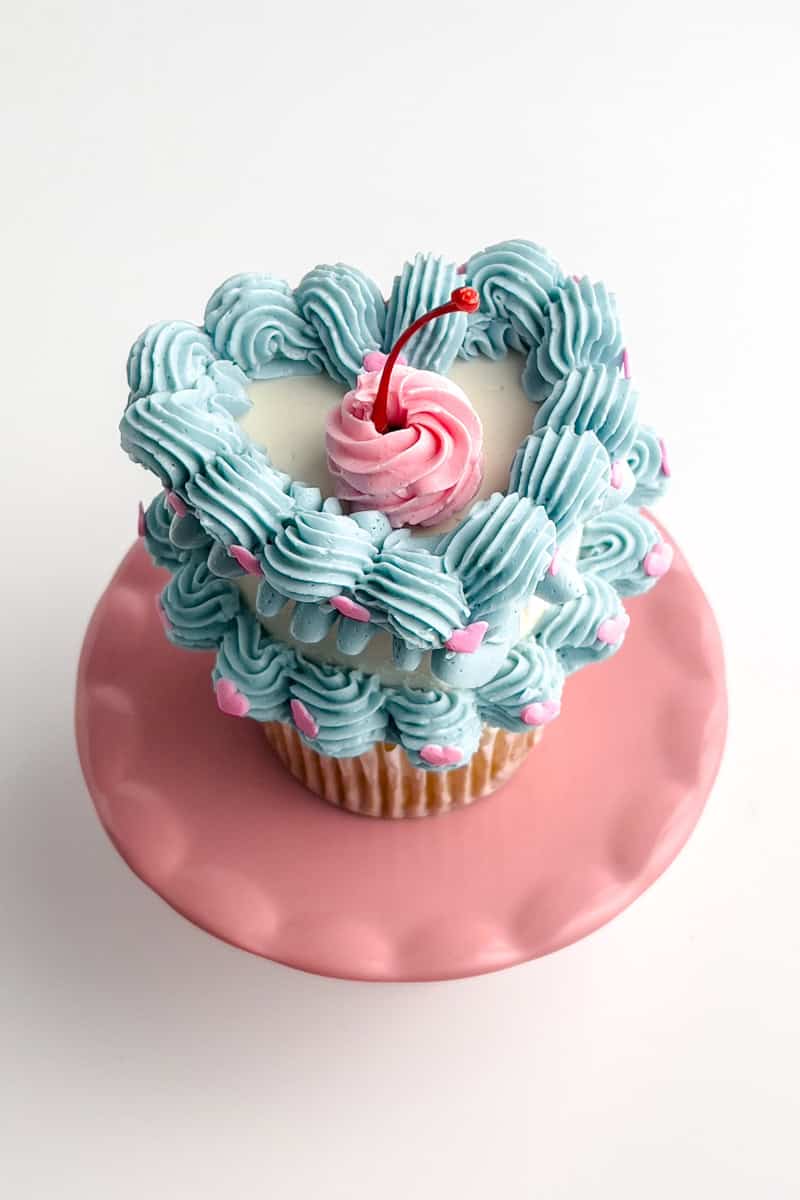
9. Step 9: With a pink buttercream and Wilton piping Tip #18, pipe a penny-sized swirl of buttercream in the middle of the heart. Place a cherry stem on top of the swirl for more flare.
Hint:
For a more traditional or vintage Lambeth-style design, have fun experimenting with different techniques as you decorate your cupcake. Try using a variety of piping tips, mix and match buttercream colors, and play with textures to add depth and elegance. By combining these elements, you can create a beautifully intricate and timeless look that's sure to impress!
Video Tutorial
Decorating Variations
With the decorating theme consisting of primary and secondary colors, the colors can be changed to reflect a specific occasion or event. Along with color, you can modify the shape of the 'mini cake' and add new textures.
Variation Ideas:
Color - Change the colors to reflect a holiday or meaningful theme. For example, during Pride Month, you can draw inspiration from an LGBTQIA+ flag, such as the transgender, bisexual, or non-binary flag. Similarly, for Halloween, you might choose classic orange and black, or for Christmas, traditional red and green. By tailoring the colors to a specific celebration or cause, you can add a personal and festive touch to your design. This not only enhances the theme but also makes your creation more meaningful and unique.
Theme- Create a theme centered around a specific holiday. For a simple decoration style, start by choosing two primary colors commonly associated with that holiday (for example, pink and red for Valentine's Day), and use them as your main buttercream colors. Next, between the shell decorations (such as where the pink hearts were used in this tutorial), replace them with a themed cupcake topper or a candy melt for an added touch of detail. This will not only enhance the overall look but also bring a fun and festive element to your design.
Shape - Change the Shape
For a Birthday- Instead of using a heart cupcake mold, try a different shape mold. For instance, if someone loves dinosaurs, try a silicone mold in a different shape and create a 3D version. Try using a donut-shaped silicone mold and decorate your donut cupcakes with the birthday person's favorite flavor or decoration.
Top Tip
Ensure the buttercream you use for your color base is at a warm room temperature or soft to the touch. Plan ahead by setting your buttercream aside a few hours before you intend to use it. This will allow it to reach the ideal consistency-soft yet firm enough to hold its shape.
FAQ
Yes! You can use any type of buttercream with a shaped silicone mold.
Your buttercream needs to be soft to the touch before filling the mold - pliable enough to press in cleanly and fill in all the air bubbles to avoid gaps in your heart.
Two ways to get there:
1. Let it come to room temperature. Press your finger into the surface - it should leave an indent easily without feeling greasy or oily. Depending on your kitchen temperature, this can take anywhere from 30 minutes to a few hours. If your kitchen runs warm, check it sooner.
2. Microwave a small portion. Scoop out a small amount and microwave in short bursts until just slightly melted. Stir until smooth and fully recombined, then fold it back into the rest of your buttercream to bring the whole batch to the right temperature.
Related
Looking for other recipes like this?
Vintage Style Heart Cupcakes
Materials
- Cupcakes
- Heart Shaped Silicone Mold for Baking
- Room Temperature Buttercream or Frosting
- Spatulas
- Food Coloring
- Piping Bags
- Piping Couplers
- Wilton #70 piping tip
- Wilton #18 piping tip
- Wilton #32 piping tip
- Sprinkles
- Marshino Cherry Stem - optional
Instructions
- Prepare Your Buttercream: Divide your buttercream into two or three portions, depending on your design. Color each portion accordingly one as the primary base color, one as a secondary color, and, if using three, an accent color. Ensure your primary base color is at room temperature or slightly warm for smooth piping.Room Temperature Buttercream or Frosting, Food Coloring
- Fill the Piping Bag: Insert a coupler into a piping bag. Using a spatula, transfer the colored buttercream into the bag.Spatulas, Piping Bags, Piping Couplers
- Fill the Mold: Pipe the primary base color into a heart-shaped baking mold, filling it up to the top without overfilling. To remove air bubbles, gently shake the mold up and down.
- Attach the Cupcake: Place the top of the cupcake face down onto the buttercream-filled mold. Press lightly to ensure it adheres to the buttercream.Cupcakes
- Freeze & Unmold: Freeze the buttercream heart cupcake for 15 minutes. Carefully remove it from the mold, ensuring the frosting and cupcake stay intact.
- Pipe the First Top Border: Fit a Wilton #70 piping tip onto a piping bag filled with your secondary buttercream color. Pipe a steady, even border along the top edge of the buttercream heart.Wilton #70 piping tip
- Create a Shell Border: Swap the Wilton #70 tip for a Wilton #32 shell border tip. Pipe a wavy, shell-like pattern along the top border. Add sprinkles between the shells for extra decoration.Wilton #32 piping tip
- Decorate the Bottom Border: Repeat the wave motion along the bottom edge of the heart and add sprinkles on top of the shells.Sprinkles
- Finishing Touches: Using a Wilton #18 tip and pink buttercream, pipe a small swirl in the center of the heart. Place a cherry stem on top for an extra touch of flair.Wilton #18 piping tip, Marshino Cherry Stem - optional
Leave a Reply